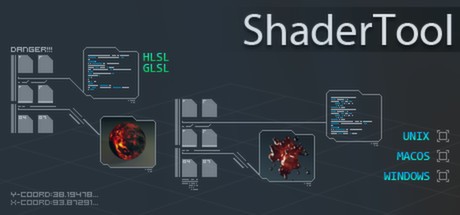
ShaderTool
(PC)

-
Kategorie:
-
Publisher:BiteTheBytes GmbH
-
Entwickler:Stefan Kraus, Timo Armbruster
-
Releasedatum:01. Apr 2014 (vor 12 Jahren)
Key-Preisvergleich

Beschreibung
YES - ShaderTool has reached FINAL STATUS!
It capsulates a powerful node based system and an easy to use code editor to create shaders of any kind (except compute shader) with full Oculus Rift DK 2 support in addition!
ShaderTool provides a flexible and editable node-powered pipeline that allows you to write shaders without also having to have written an engine. Use the integrated code editor to directly write shader code in either HLSL (DirectX) or GLSL (OpenGL).Features
- Write shaders and view results instantly
- Support of HLSL and GLSL (DirectX and OpenGL)
- Latest shader models fully supported
- Code editor with syntax highlighting, warning and error output
- Easy-to-use node-based render pipeline
- Import models, textures, audio files and other resources per drag'n drop
- Export your shaders and share them with others
- Create template projects for more efficient shader development
- Direct use of shaders in DirectX or OpenGL applications
- Oculus Rift DK 2 fully supported (Direct Acces Mode)
- Use audio streams for shader input to create stunning effects
- Post-Effects fully supported
- Create multiple render-pipelines and combine them to create AAA shaders used in games
Finally a modern shader IDE for programmers and FX artists
Maybe you are one of those who was looking without avail for a really good shader development environment. You might ended up with the FX Composer or RenderMonkey – both very powerful shader IDEs but with one big disadvantage – both are sadly not maintained anymore and therefore they do not support the newest shader models!
So what else was out there? Sadly … almost nothing! Some IDEs are more after GLSL and very few after HLSL. Some IDEs only support the creation of post effects – but that is not enough for a professional shader developer!
That is exactly what we were just thinking a year ago and we thought that it was time to change that. So we started to develop ShaderTool. And now its finished - get it and start coding!What is ShaderTool capable of?
The current version of ShaderTool allows you to write HLSL and GLSL shaders of any kind.
But you not only can write shaders by hand but also build up your own render pipeline through the easy-to-use node-based-system and combine multiple shaders to create state of the art effects.
You can load or just drag and drop models, textures and audio files of any kind! The integrated code editor supports syntax highlighting, shows warnings and errors with quick jump functionality and other typical code editor stuff.
Also, we are improving ShaderTool every day and if you have suggestions or ideas: PLEASE LET US NOW! During the alpha and beta phase a lot of ideas from users have been implemented - so your voice matters!
There is so much more … try out for yourself!
Screenshots & Videos


Key-Aktivierung
Um einen Key bei Steam einzulösen, benötigst du zunächst ein Benutzerkonto bei Steam. Dieses kannst du dir auf der offiziellen Website einrichten. Im Anschluss kannst du dir auf der Steam Webseite direkt den Client herunterladen und installieren. Nach dem Start von Steam kannst du den Key wie folgt einlösen:
- Klicke oben im Hauptmenü den Menüpunkt "Spiele" und wähle anschließend "Ein Produkt bei Steam aktivieren...".
![]()
- Im neuen Fenster klickst du nun auf "Weiter". Bestätige dann mit einem Klick auf "Ich stimme zu" die Steam-Abonnementvereinbarung.
![]()
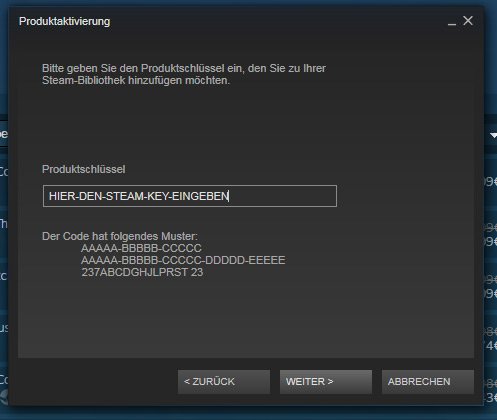
- Gebe in das "Produktschlüssel"-Feld den Key des Spiels ein, welches du aktivieren möchtest. Du kannst den Key auch mit Copy&Paste einfügen. Anschließend auf "Weiter" klicken und das Spiel wird deinem Steam-Account hinzugefügt.
![]()
Danach kann das Produkt direkt installiert werden und befindet sich wie üblich in deiner Steam-Bibliothek.
Das Ganze kannst du dir auch als kleines Video ansehen.
Um einen Key bei Steam einzulösen, benötigst du zunächst ein Benutzerkonto bei Steam. Dieses kannst du dir auf der offiziellen Website einrichten. Im Anschluss kannst du dir auf der Steam Webseite direkt den Client herunterladen und installieren. Nach dem Start von Steam kannst du den Key wie folgt einlösen:
- Klicke oben im Hauptmenü den Menüpunkt "Spiele" und wähle anschließend "Ein Produkt bei Steam aktivieren...".
![]()
- Im neuen Fenster klickst du nun auf "Weiter". Bestätige dann mit einem Klick auf "Ich stimme zu" die Steam-Abonnementvereinbarung.
![]()
- Gebe in das "Produktschlüssel"-Feld den Key des Spiels ein, welches du aktivieren möchtest. Du kannst den Key auch mit Copy&Paste einfügen. Anschließend auf "Weiter" klicken und das Spiel wird deinem Steam-Account hinzugefügt.
![]()


Danach kann das Produkt direkt installiert werden und befindet sich wie üblich in deiner Steam-Bibliothek.
Das Ganze kannst du dir auch als kleines Video ansehen.